


Key Takeaways
A careful inspection does more than locate a drip. It helps determine whether the problem is isolated or connected to deeper damage in the roofing system.
- Water stains may appear far from the point where moisture enters.
- Attic, ceiling, roof-surface, and drainage checks all contribute to an accurate diagnosis.
- Damaged shingles, failed flashing, poor drainage, and storm damage are common causes.
- A repair may suit limited damage, while widespread deterioration can call for replacement.
- Clear documentation and detailed estimates make the next decision easier.
What a roof leak inspection reveals
A roof leak inspection follows the evidence from the living space toward the roof system. The visible symptom may be a ceiling stain, peeling paint, damp insulation, or a musty smell, but those clues rarely tell the whole story. A professional looks for both the immediate entry point and the conditions that allowed water to move or remain trapped. That distinction can prevent repeated repairs in the wrong place.
Visible signs of water intrusion
Inside the home, water stains are often the first warning. Brown or yellow discoloration, bubbling paint, soft drywall, damp trim, and dripping after rainfall all deserve attention, even if the area appears small. Moisture can also leave less obvious signs, such as a persistent odor or insulation that has become compressed and wet.
The timing matters as well. A stain that grows during a storm suggests active intrusion, while a mark that returns days later may point to water retained in insulation or framing. Finding a roof leak is ultimately a tracing exercise, not merely a search for the most noticeable discoloration.
Hidden damage beneath shingles and flashing
The roof surface can look reasonably sound while the layers beneath it have deteriorated. Moisture may damage underlayment, decking, rafters, insulation, or the wood around roof penetrations. Flashing that has separated or corroded can let water enter gradually, creating damage that remains hidden until the ceiling shows it.
An inspection should therefore ask what condition the underlying materials are in, not just whether a few shingles need attention. The hidden layers matter because they support the roof’s ability to shed water and protect the structure below.
How leaks travel through roofing systems
Water does not always fall straight down from its entry point. It can follow the slope of the decking, run along rafters or nails, collect around penetrations, and emerge at a ceiling seam some distance away. Insulation can further obscure the route by absorbing water before it reaches the room below.
This is why sealing the spot directly above an interior stain can fail to solve the problem. The inspector compares interior evidence with roof pitch, seams, valleys, flashing, and nearby penetrations to reconstruct the path rather than relying on a single point of view.
When a small stain indicates a larger problem
A small stain may come from one damaged shingle, but it can also be the first visible symptom of a broader failure. Repeated dampness can weaken decking, encourage biological growth, and affect finishes or framing. If the roof is older or has a history of recurring leaks, the inspection should consider the condition of the complete system.
The right response depends on the extent, location, and age of the damage. A limited problem may be repairable, but recurrence is a reason to investigate more deeply before choosing the least expensive apparent answer.
How professionals inspect a leaking roof
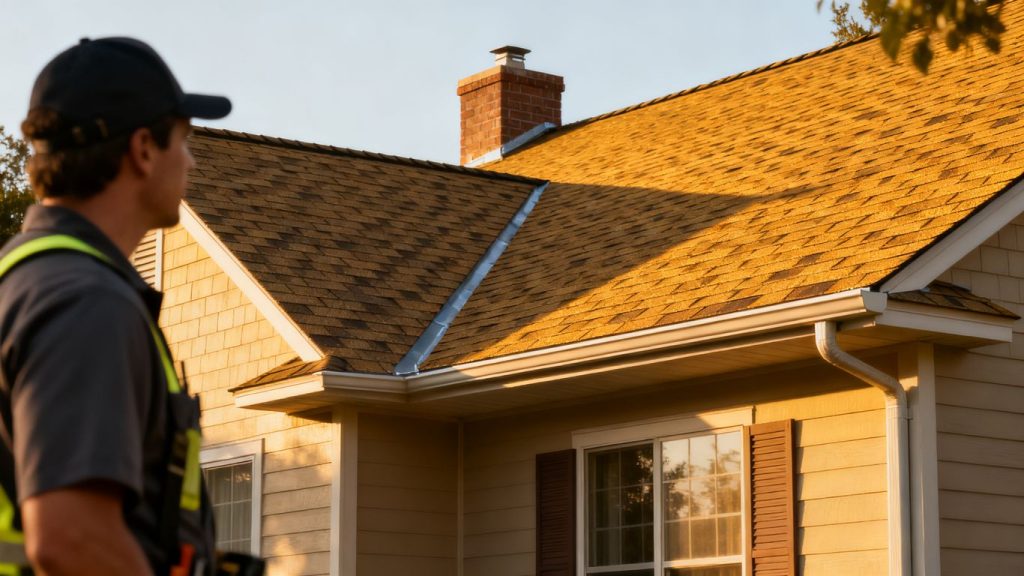
A professional inspection combines observations from inside and outside the home. The process usually begins with a conversation about when the leak appears, what weather preceded it, and whether anyone has attempted earlier repairs. From there, the inspector evaluates the roof without assuming that the first visible symptom is the source. The goal is a documented explanation that supports a practical next step.

Interior attic and ceiling assessment
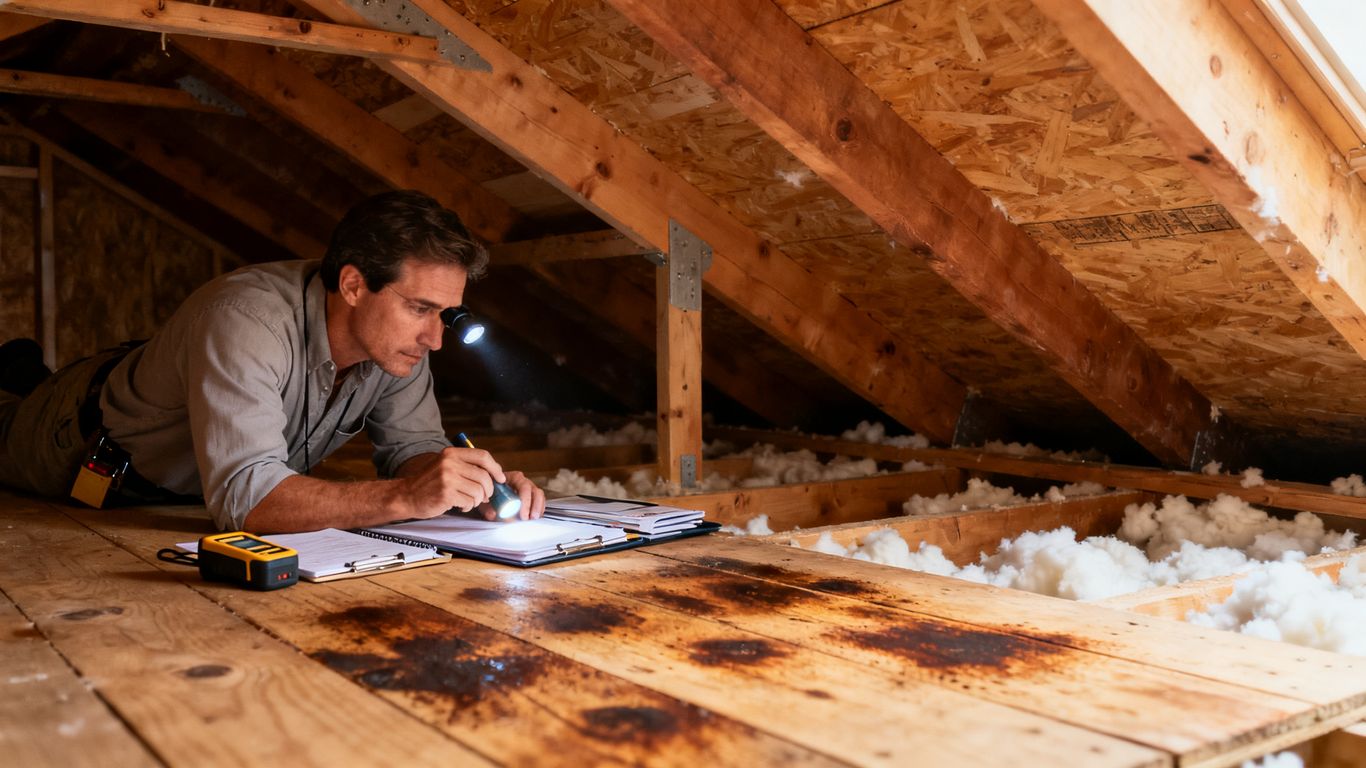
The interior review looks at ceilings, wall intersections, attic insulation, roof framing, and any accessible penetrations. Inspectors may find water marks, damp wood, rusted fasteners, compressed insulation, or mold-like growth that helps establish the direction and duration of moisture movement. They also check whether ventilation conditions are contributing to condensation that could be mistaken for a roof leak.
Safety comes first in an attic. Homeowners should avoid walking across areas that may be weakened or stepping between framing members without appropriate support and protection. Interior evidence is valuable, but it is only one part of the diagnosis.
Exterior roof and shingle evaluation
From the exterior, the inspector examines shingle alignment, exposed fasteners, lifted or missing tabs, granule loss, cracks, blistering, and areas where water may collect. The roof’s age and general wear help put individual defects into context. A single damaged shingle on an otherwise sound field is a different situation from widespread brittleness or recurring surface failure.
The evaluation should also include roof edges, ridges, penetrations, and transitions between different roof planes. Photographs and measured observations make it easier to connect exterior conditions with interior symptoms and to compare repair options fairly.
Flashing, valleys, vents, and chimney checks
Flashing protects the joints where roofing meets walls, chimneys, skylights, and other vertical surfaces. Valleys concentrate water, while vents and other penetrations interrupt the roof surface, so each requires careful attention. Loose metal, cracked sealant, improper overlaps, and debris can all create pathways for moisture.
Chimney areas deserve particular care because their masonry, counterflashing, and roof flashing must work together. An inspection that only scans the shingle field can miss the vulnerable transitions where many leaks begin.
Drone and infrared inspection methods
Drones can provide a safer view of steep, elevated, or difficult-to-access roof areas, while on-site inspection remains important for examining materials and structural details directly. Mustang Roofing describes its process as combining drone-supported and on-site inspection to identify root causes of persistent roofing failures. That capability is useful when a roof’s geometry, height, or condition makes a complete ground-level view difficult.
Infrared tools may also help identify temperature differences associated with moisture or insulation conditions, although their usefulness depends on weather, roof construction, and the skill of the person interpreting the results. Technology supports the inspection; it does not replace sound roofing judgment.
Common causes of roof leaks
Leaks often result from several small weaknesses working together rather than one dramatic defect. Age, weather exposure, installation quality, drainage, and maintenance all influence how well a roof performs. Understanding the likely causes helps homeowners ask better questions when the inspection findings are explained. It also clarifies why a surface repair may not address the underlying failure.
Damaged, missing, or aging shingles
Shingles can crack, curl, lift, lose protective granules, or disappear after wind. As roofing materials age, they may become less flexible and less able to resist repeated temperature changes. Damaged areas around ridges, edges, and penetrations can be especially vulnerable because those locations receive more wind and water movement.
A few isolated defects may support a targeted repair. If deterioration is widespread, however, replacing individual shingles may only postpone a larger project and can make color matching difficult.
Failed flashing and sealants
Flashing is designed to direct water away from joints, but it can corrode, loosen, bend, or become poorly integrated with adjacent roofing. Sealants also age and may shrink, crack, or separate from the surface. These failures are common around chimneys, vent pipes, walls, skylights, and roof-to-roof intersections.
The repair must address how the flashing is installed, not just cover the visible seam. Otherwise, water may continue to enter behind the repair and travel through the same concealed route.
Clogged gutters and poor drainage
Gutters and downspouts move water away from the roof and foundation. When leaves, sediment, or nesting material obstruct that path, water can back up beneath roof edges or spill against exterior walls. Poorly placed downspouts, inadequate slope, and low areas on the roof can create similar problems.
A useful inspection connects the roof to the drainage system rather than treating them as separate concerns. Homeowners can reduce future stress by keeping gutters clear and watching for overflow during heavy rain, but persistent drainage defects may require a contractor’s assessment.
Storm, wind, and hail damage
Storms can lift shingles, damage flashing, bruise roofing materials, and drive water into areas that previously appeared sound. Hail may leave subtle marks that are difficult to identify from the ground. Wind damage can also begin a slow failure that becomes visible only after the next significant rainfall.
After severe weather, document conditions from a safe location and protect belongings from interior water. A roofing emergency guide can help homeowners organize immediate safety steps and records while arranging a professional inspection.
What happens during the inspection process
The inspection process should produce more than a verbal guess. A contractor gathers evidence, records affected areas, checks the roof assembly, and explains how the observations relate to the recommended work. Homeowners benefit when the report distinguishes confirmed damage from areas that need further access or testing. That clarity makes it easier to plan without feeling pressured by uncertainty.
Documenting symptoms and moisture damage
The inspector records stains, drips, damp insulation, damaged finishes, and other signs inside the home. Exterior photographs can then be matched to those locations, although the two points may not align exactly. Notes about rainfall, timing, odor, and prior maintenance add useful context that a photograph alone cannot provide.
Good documentation also helps with communication among homeowners, contractors, and insurers. Keep copies of photographs, inspection notes, estimates, and invoices in one place, especially when a storm may be involved.
Checking the decking and structural components
Once the likely entry areas are identified, the inspection considers the decking and structural components beneath the roofing materials. Soft, stained, or deteriorated decking may no longer provide a reliable base for new roofing. Rafters and other framing members may also need attention if moisture has remained present for a long time.
This stage is one reason a surface-only assessment can be incomplete. The roof must be evaluated as an assembly, because new materials cannot correct weakened support or concealed rot by themselves.
Identifying previous patching and installation problems
Earlier repairs can hide the original failure, restrict drainage, or add layers that make the roof harder to evaluate. Inspectors look for mismatched materials, exposed fasteners, uneven transitions, inadequate flashing, and installation details that do not direct water cleanly away from vulnerable points. The question is not whether someone worked on the roof before, but whether the work corrected the cause.
A written explanation should identify observed installation concerns without overstating what cannot be confirmed. When access is limited, the contractor should say so and explain what additional investigation would establish.
Separating repairable damage from system-wide failure
The central decision is whether the roof has a localized defect or has reached the point where multiple components are failing. Inspectors weigh the scope of damage, material age, recurring leak history, decking condition, ventilation, and the likelihood that adjacent areas will fail soon. A repair can be sensible when the surrounding system remains dependable.
For a roof with extensive structural weakness, repeated leaks, and widespread material decline, replacement may offer a more coherent solution. Mustang Roofing’s Douglasville case study describes an inspection that found structural issues beyond a limited repair and led to a full restoration, including tear-off, decking review, dry-in protection, and new roofing materials.
Choosing the right roof leak solution
The best solution is the one that addresses the actual failure while fitting the roof’s condition and the homeowner’s plans. A contractor should explain what can be repaired, what cannot be verified without removal, and what risks remain after each option. Price matters, but so do durability, installation quality, ventilation, and protection during the work. A clear scope helps prevent a temporary answer from becoming a repeated expense.
When a targeted repair may be enough
A targeted repair may be appropriate when the leak has a clearly identified source and the surrounding shingles, flashing, decking, and underlayment remain in good condition. Examples can include replacing a small number of damaged shingles, correcting a discrete flashing defect, or restoring a properly defined drainage issue. The contractor should explain why the repair is expected to hold and what nearby conditions were checked.
Ask whether the estimate includes removal of damaged materials and inspection of the layers beneath them. A repair that only covers the visible symptom may leave the original path open.
Signs that a roof replacement is necessary
Replacement becomes more likely when leaks recur across different areas, materials are broadly aged or brittle, decking is deteriorated, or structural weaknesses affect the roof assembly. Significant storm damage can also make replacement more practical than trying to combine many disconnected repairs. The final decision should follow a documented assessment rather than a single visual clue.
For a deeper planning framework, roof replacement warning signs can help homeowners organize questions about age, interior intrusion, materials, and cost. A complete replacement should include a plan for removal, substrate review, weather protection, installation, and cleanup.
Why roof-over installations may not solve recurring leaks
Adding new roofing over an existing layer can conceal damaged decking, flashing defects, and trapped moisture. It may also make it harder to confirm whether the old system is dry and structurally sound. When leaks have persisted, covering the visible surface can leave the original pathway untouched and add weight without resolving the underlying condition.
A full tear-off allows the contractor to see the decking and address weak areas before the new system is installed. The appropriate approach depends on local requirements and the roof’s condition, but recurring leaks deserve more than another layer of uncertainty.
The role of underlayment, ventilation, and dry-in protection
Underlayment helps protect the roof deck beneath the finished roofing, while flashing directs water around vulnerable transitions. Ventilation manages heat and moisture in the attic when properly designed, and dry-in protection limits exposure while the project is underway. These components work together; leaving one out can reduce the reliability of the complete system.
Mustang Roofing’s documented restoration process includes synthetic underlayment, specialized flashing, and a dry-in phase before the final architectural shingle installation. Those details illustrate why a roof estimate should identify the layers and protection methods, not only the visible finish.
Roof leak inspection costs and next steps
Inspection pricing varies because roofs vary. A small, accessible roof with one obvious symptom takes a different amount of time than a steep, complex, or repeatedly leaking system with limited attic access. The inspection itself is only the beginning; the useful outcome is a clear explanation of what was found and what work, if any, should follow. Get the findings in writing so estimates can be compared on equal terms.
Factors that affect inspection pricing
Contractors may consider roof size, pitch, stories, material type, accessibility, attic configuration, storm conditions, and the extent of suspected damage. Additional documentation, moisture testing, drone work, or infrared assessment can affect the scope as well. Ask whether the quoted inspection fee includes photographs, a written report, and a discussion of repair or replacement options.
A low price is not automatically better if it produces only a brief surface glance. The useful measure is whether the inspection answers the questions that prompted the call.
Questions to ask a roofing contractor
Before hiring anyone, ask about licensing, insurance, inspection methods, access requirements, expected deliverables, and how concealed damage will be handled. It is also reasonable to ask who will perform the work, whether the estimate is itemized, and what warranty terms apply. Hiring a qualified roofer offers a broader checklist for credentials, structural assessment, technology, estimates, and financing.
Keep the conversation specific. A contractor who can explain the observed failure in plain language is easier to evaluate than one who offers only a generic recommendation.
How to compare inspection findings and estimates
Compare the cause identified, the areas inspected, the materials proposed, and the preparation included in each estimate. Two prices may differ because one includes decking replacement, flashing, ventilation, disposal, or temporary weather protection while the other does not. A written scope should make those differences visible.
The following comparison points are useful when reviewing proposals:
| Estimate element | What to verify | Why it matters |
|---|---|---|
| Inspection findings | Locations, photos, and moisture evidence | Connects the recommendation to observed conditions |
| Tear-off and disposal | Number of layers and cleanup | Reveals whether concealed materials will be examined |
| Structural work | Decking, framing, and reinforcement allowances | Addresses support beneath the finished roof |
| Roofing assembly | Underlayment, flashing, ventilation, and finish material | Shows what protects the system beyond shingles |
| Warranty and payment | Coverage, exclusions, schedule, and terms | Clarifies protection and financial obligations |
After reviewing the table, ask each contractor to explain any missing line item rather than assuming it is included. A lower total may reflect an incomplete scope, not a more efficient project.
Financing and planning for major roof work
A replacement can be a substantial household expense, so planning should begin with the documented scope and a realistic budget. Ask about payment schedules, financing terms, interest, fees, and what happens if concealed damage is discovered. Do not compare monthly payments without also comparing the total repayment amount.
Mustang Roofing’s source material describes flexible financing programs used to make a major restoration manageable for one Douglasville family; that individual outcome is not a guarantee for every homeowner. For general planning, roof financing options can help readers review payment plans and questions to raise before signing an agreement. When the project is urgent, arrange temporary protection safely while the full plan is being finalized.
Schedule A Free Inspection
If a leak keeps returning or you are unsure what lies beneath the surface, contact Mustang Roofing for a comprehensive inspection and a clear path forward. You can schedule an inspection and discuss the condition of your roof, available options, and the next practical step.
Conclusion
A roof leak inspection is most valuable when it traces moisture to its source, examines the layers beneath the visible surface, and explains whether repair or replacement will genuinely protect the home. Acting early, documenting the evidence, and comparing complete scopes can turn a stressful leak into a manageable roofing decision.
Frequently Asked Questions
How soon should I schedule a roof leak inspection?
Schedule one as soon as you notice active dripping, a growing stain, damp attic materials, or a musty odor. Prompt evaluation can limit the time moisture spends affecting finishes, insulation, decking, and framing.
Can a ceiling stain show the exact leak location?
Not necessarily. Water can travel along decking, framing, fasteners, and insulation before appearing inside, so the ceiling stain may be downhill or several feet away from the entry point.
What should I do while waiting for an inspection?
Place a container beneath active drips, move belongings away from the affected area, and document visible damage with photographs. Avoid climbing onto the roof during rain or attempting work in unsafe conditions.
Does every roof leak require replacement?
No. A clearly isolated defect on an otherwise sound roof may be repairable. Replacement is more likely when damage is widespread, leaks recur, materials are failing, or the decking and structure are compromised.
Should the attic be inspected during a roof leak assessment?
Yes, when safe and accessible. The attic can reveal damp insulation, stained decking, wet framing, and ventilation conditions that help explain how moisture entered and traveled.
How can I compare roofing estimates fairly?
Compare the documented cause, areas inspected, tear-off, disposal, decking allowances, underlayment, flashing, ventilation, finish materials, warranty terms, and payment schedule. A complete line-item scope is more useful than comparing totals alone.
Are drones useful for roof inspections?
Drones can provide views of steep, tall, or difficult-to-access areas and may improve photographic documentation. They work best as part of a broader inspection that also considers interior evidence, roof materials, flashing, drainage, and structural conditions.